Vietnamese Omelets

When I look back over my many years of living in dorms, sorority houses and too-small undergraduate apartments, I realize that all of my roommates have affected the way I cook, and perhaps more importantly, eat. My first roommate, Angela, taught me to appreciate a good bowl of mac and cheese, and that nothing goes as well with a movie as popcorn and chocolate. My next roommate, Liz, helped me discover that the most delicious 2am food is a grilled cheese and tomato sandwich. With my suite-mates Lauren, Anita, Shweta, Liz and Kasena I discovered that you can cook almost anything you need in an electric hotpot (including a delicious passover sedar). My next roommate, Van, and current roommate/partner-in-crime, Anita, have perhaps taught me the most about cooking. Since most of you had already had the pleasure of reading about mine and Anita’s cooking adventures, I’d like to take this post as an opportunity to tell you about Van.
Van and I first started living together during our Junior year of undergrad. We, along with 2 other sorority sisters, spent our first year as roommates living in the “four pack” of our sorority house. Given the success of this first living situation, we then decided to remain as roommates and move into a small apartment in Little Italy with Van’s fiance Jon and our friend Lauren. We were lucky enough to spend 2 years living in that apartment…scratch that…we were lucky enough to spend 2 year EATING in that apartment. It was during those 2 years that Van introduced me to some of my absolute favorite recipes. It is because of her that I am obsessed with Sriracha, fish sauce and pho. In fact, I’m not sure I had ever tasted Vietnamese food before living with her…man was I missing out! The recipe I’m describing today is one of a few Vietnamese dishes Van taught me to make, and that I will be sharing with everyone via Braised Anatomy. This dish is one of my absolutely favorite meals. It’s my “go to” dinner when nothing else seems appealing, and I something that never leaves me feeling disappointed.
Before proceeding to the recipe I need to warn everyone about one of the ingredients in this dish…Fish Sauce. If you’ve never tried to cook an Asian dish, it’s pretty unlikely that you’ve ever heard of fish sauce. Now don’t be afraid (or grossed out), but fish sauce is really nothing more than fermented fish and salt. I’ll admit that it doesn’t have the best smell in the world, but it will add a complex saltiness to dishes that you can’t get from adding salt alone. If this is your first time cooking with fish sauce, I recommend going to a local asian grocery store and picking up some “Viet-Huong Three Crab Fish Sauce“. I’m not sure if this is really the most well known fish sauce, but it’s the one I first used so I guess I’m a little brand loyal. Try not to be scared off by the smell when you first open the bottle. I promise the smell will disappear when you cook the food. Okay. Now that you’ve been sufficiently warned, we can move on to the recipe.

What you need (makes 4 servings):

  • 6 eggs
  • 2 medium sized tomatoes, diced
  • 1 medium onion, diced
  • 2-3 tbs fish sauce
  • 2 tsp sesame oil
  • 2-3 cups rice (I prefer brown rice)
  • Sriracha
  • Spicy Mayo
  • 1 Cucumber, sliced

What you need to do:

  1. Heat the 2 tsp of sesame oil in a non-stick frying pan.
  2. Add the onions, wait a few minutes then add the tomatoes (you want to give the onions a few minutes to soften).
  3. Beat the 6 eggs in a bowl and mix in the fish sauce.
  4. Pour the egg/fish sauce mixture into the frying pan and let it sick for about 6-8 minutes on medium high.
  5. Flip the omelet so it cooks on both sides. Now I’m sure there’s a “pretty” way to do this, but I just break the omelet into sections and flip each individual section so I’m sure everything is cooked through. Cook the other side for 3-4 minutes.
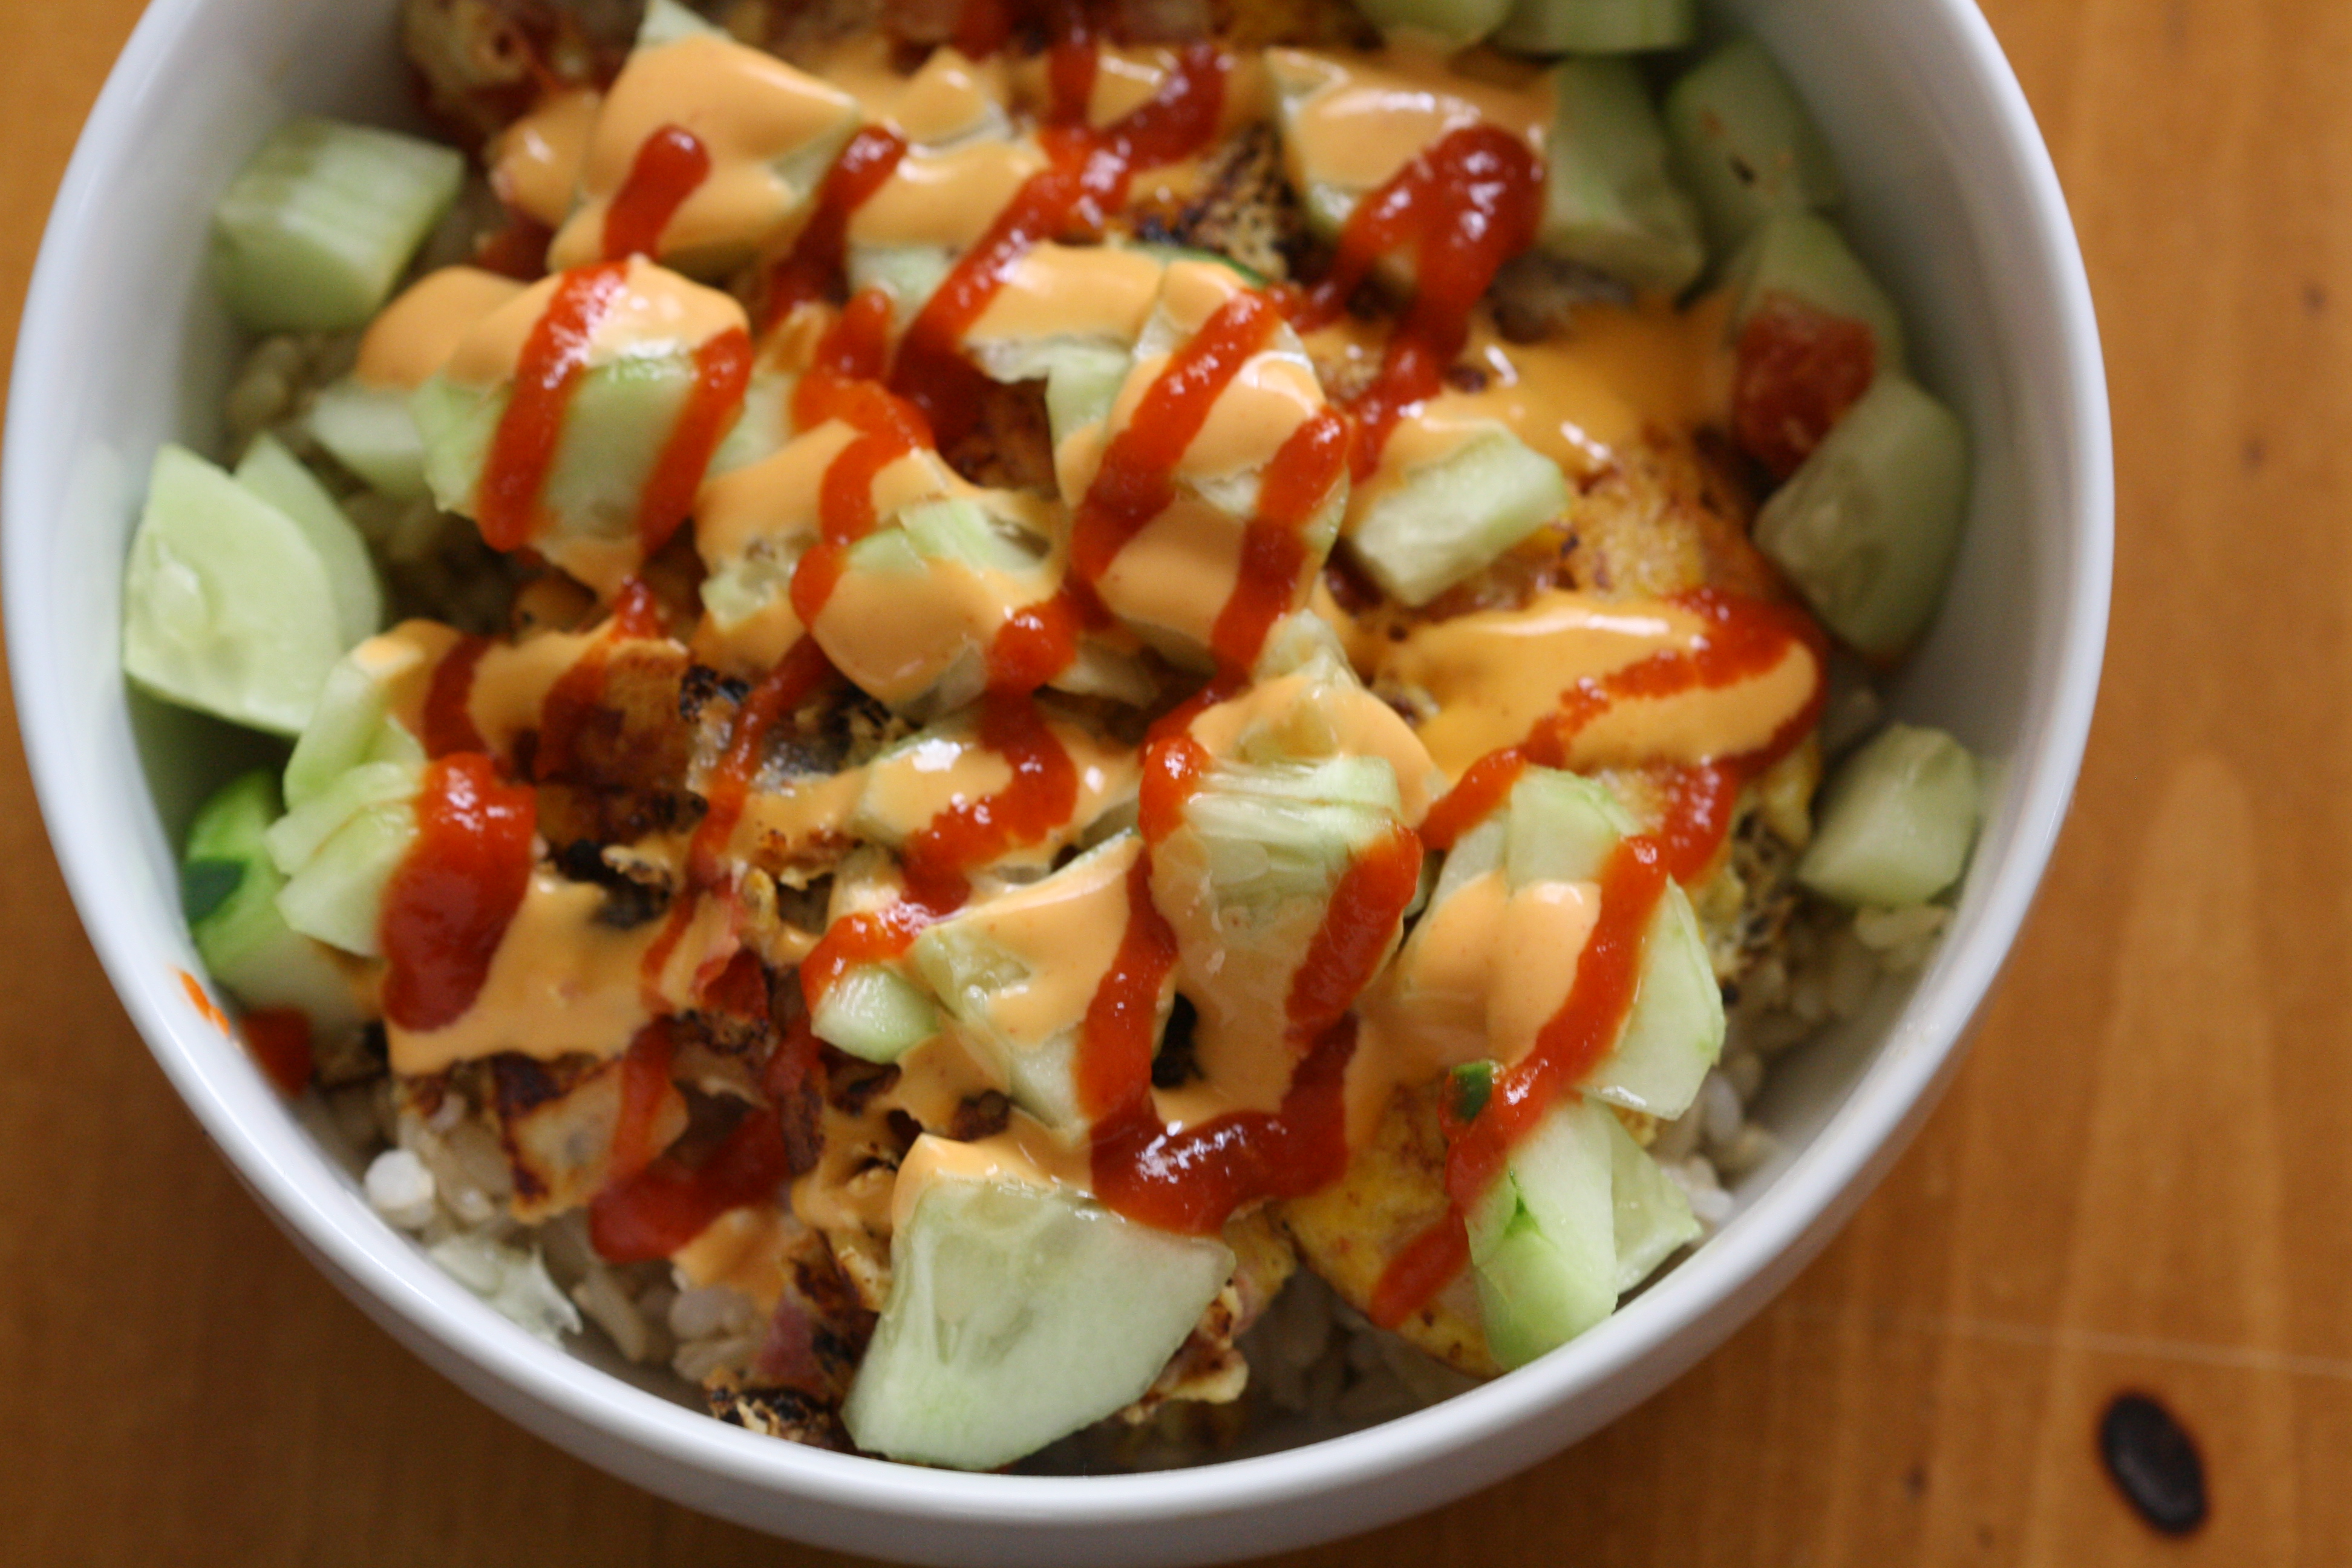
  6. Serve the omelet with rice and fresh cucumbers (I usually add at least a third to a half of a cucumber to my place), and top with spicy mayo and sriracha.
  7. Enjoy!

Photos taken by Myles Nickolich (http://nickolich.shutterfly.com/)

Posted in Eggs, Vegetarian | 9 Comments

Indian Spinach (Palakchi Bhaji)

My mom comes from a long line of women who cooked without measuring cups and spoons.  The execution of a traditional dish is like the retelling of an epic poem — the storyline has been passed from generation to generation by demonstration rather than by pen and paper.
A little more than a year ago I was at home trying to copy down this recipe as she cooked.  I’d watch her blindly throw in some chili powder with a dinner spoon.  “Wait, you forgot to measure that!”  I’d complain.  I’m sure for her, cooking is visceral.  It’s about trust in the tradition of what you’re making, memories of what you saw your mother do, and familiarity with ingredients you’ve handled hundreds of times. Talk about faith of a mustard seed.

Sometimes I also think that this cavalier method of cooking is a way to keep me coming home: these dishes, snatched out of the air and written down as recipes for my benefit, never taste quite the same in this kitchen.
One more thing: Don’t get squeamish about all of the oil in this recipe; you need fat in vegetarian dishes to carry flavor and help keep you full.  I used to try skimping on the oil when I was learning to make Chana Masala.  Eating it was like falling asleep face down with my mouth open at the beach: the spices didn’t dissolve.  They remained a grainy bane of my existence in every attempt until I actually started following my mom’s directions.

Ingredients

  • 1 cup toor daal (aka pigeon peas)
  • 6 cups water
  • 2 Tbsp oil
  • 1 tsp black mustard seeds
  • 16oz bag frozen spinach
  • 1 tsp chili powder
  • 1 tsp turmeric
  • 2-3 tsp salt

For the fodni:

  • 2 tsp black mustard seeds
  • 3 Tbsp oil
  • 3 cloves garlic, sliced into slices of equal thickness
Wash the daal and cook with water in a stockpot (put a wooden spoon in the stockpot so that the water does not boil over). Cook on a high flame, stirring every 10 minutes for 20 minutes until the daal looks soupy. Turn off the flame.
In a big, deep pan, add the oil and warm on a high flame for 1 minute. Add the mustard seeds, and cover the pot. Wait until the mustard seed has popped (their color will turn grey). Turn off the flame when the seeds start popping.
Remove the cover and add a full bag of spinach. Cook on a medium flame, covered, until the spinach defrosts. Break it up with a wooden spoon as it defrosts to make sure it doesn’t stick to the bottom.  (Optional: when the spinach is defrosted you can pulse it in a food processor to make it smooth.  I don’t do this.)
Put the spinach back in the pot. Add the cooked daal. Add the turmeric, the chili powder, and the salt. Add water if necessary so that it doesn’t dry out for the next step.
Stir well. Taste to adjust the salt. Cook on low/medium flame, stirring frequently for 15 minutes. Remove to a container. When the container cools, store in the refrigerator for up to a week or in the freezer until block exams.
For the fodni:
Add the oil to a small pot and warm for one minute on a high flame. Turn off the heat and add the mustard seed and immediately cover the pot. When the mustard seed begins to pop, turn off the flame. When the mustard seeds have popped add the garlic and swirl to fry until the garlic is a gold brown. Add to the spinach and mix before eating.
Serve with chapati or (brown) rice.
Posted in Indian, Vegetarian | 6 Comments

Spicy Mayo

I’ll start off by saying that today’s post is going to be a little short. It’s crunch time for our Block 5 exams and we’ve both been a little more focused on learning the effects of every bacteria, virus, protozoa, etc., and how to treat them, than on cooking. This isn’t to say we haven’t been eating…but I have a feeling few people are interested in hearing about my many trips to taco bell. In honor of the holiday, however, I figured I’d post an “orange” recipe. In reality, this is a little more pinkish than orange, but you get the point.
The ingredient list and preparation for spicy mayo is very simple, but absolutely delicious. In fact, I’ve become so obsessed with spicy mayo that I don’t keep “regular” mayo in the fridge anymore (and I have always been a huge Hellman’s supporter). In addition to it’s intended use for sushi, I also love eating it on turkey sandwiches, tuna sandwiches, or as a dip for just about anything (mozzarella sticks, french fries, etc.). The dish I most commonly use this on is a Vietnamese omelette (recipe to follow next week). You’ll notice that the recipe calls for a very particular kind of mayo, and I’m going to insist that you get it if you’re going to try to make this, use the right kind. “Kewpie Mayo” can be found at most Asian grocery stores (my favorite store being Tink Holl). It’s much more savory than “American” mayo…I can’t quite put my finger on the exact differences but I think it’s a little sweeter and a little creamier. Whatever the differences are, it’s just plain delicious.

What you need:

  • 1 bottle of Kewpie Mayo
  • 8-10 tbsps of Sriracha (the best hot sauce every created) depending on how hot you want it
  • 1 tbsp sesame oil
  • A large zip lock bag (to use as a pastry bag so you can get the mayo back into the bottle)

What you need to do:

  1. In a large bowl combine the bottle of mayo, sriracha and sesame oil. I recommend adding the sriracha a couple of tablespoons at a time so you can choose a spice level that works for you.
  2. Stir until the contents are completely mixed.
  3. Take a large ziplock bag and fill it with the mixture. Cut off one of the corners and use it to get the spicy mayo into the old kewpie mayo container. You could also buy an empty bottle and use it the same way, but I’m cheap and the old mayo bottle works just fine. Just a warning, this process can get a little messy, and you’ll end up with more mayo than can fit in the bottle so have something on hand to eat with the extra. You don’t want this stuff going to waste!!
  4. Enjoy!
Posted in Dip | 8 Comments

Anytime Gingerbread Cookies

Toxicities of this recipe include: raw dough overload
Dear first year med students: good luck on your test tomorrow!  Do your genes proud.
XO, Braised Anatomy


An older edition

Ingredients (Adapted only slightly from Elise’s at Simply Recipes)
  • 3 1/4 cups sifted all-purpose flour
  • 3/4 teaspoon baking soda
  • 1 Tbsp ground ginger (+ 1-2 tsp if you like that ginger feeling)
  • 1 Tbsp + 1 tsp ground cinnamon
  • 1 teaspoons ground cloves
  • 1/4 teaspoon finely ground black pepper
  • 1/2 teaspoon salt
  • 3/4 cup (1 1/2 sticks) unsalted butter (room temperature, softened)
  • 1/2 cup dark-brown sugar, packed
  • 1 large egg
  • 1/4 cup unsulfered blackstrap molasses*
  • 1/4 cup honey
Whisk together all of the dry ingredients (flour–>salt) in a medium sized bowl and set aside.  In phases, use an electric beater in a large bowl 1) whip up the butter, then combine 2) the brown sugar, 3) molasses, honey, and 5) egg.  Add the flour mixture to the wet stuff in batches, blending well with the beater with each addition (you might have to use a spatula and spoon to incorporate the last bit).  Divide in two or three batches into ziplock bags and refrigerate for at least an hour.  If you want to use the dough at a later date, seal in a ziplock bag and toss into the freezer.
Heat the oven to 350F.  Spray down the back of a cookie sheet with cooking spray, then roll out a section of gingerbread to about 1/4” thickness.  Stick this into the freezer for 5-10 minutes (hardening the dough will give you a clean cut) then use a sharp knife or a cookie cutter to cut out desirable shapes.  Remove the offending outside bits of dough, and bake in the oven for 6-7 minutes (if you make a thicker or bigger cookie, you will have to bake it for longer).  If anything, underbake it–it will continue to harden outside of the oven.  When it gets cool enough, move to a wire rack to cool completely before transferring to a tupperware container.  These should stay good-tasting for at least a week (I hope).
*Any other type of molasses will be sweeter, so if you don’t use blackstrap you can alter the molasses:honey ratio (still to get to 1/2 cup) according to your sweetness preferences.
Posted in Dessert | 2 Comments